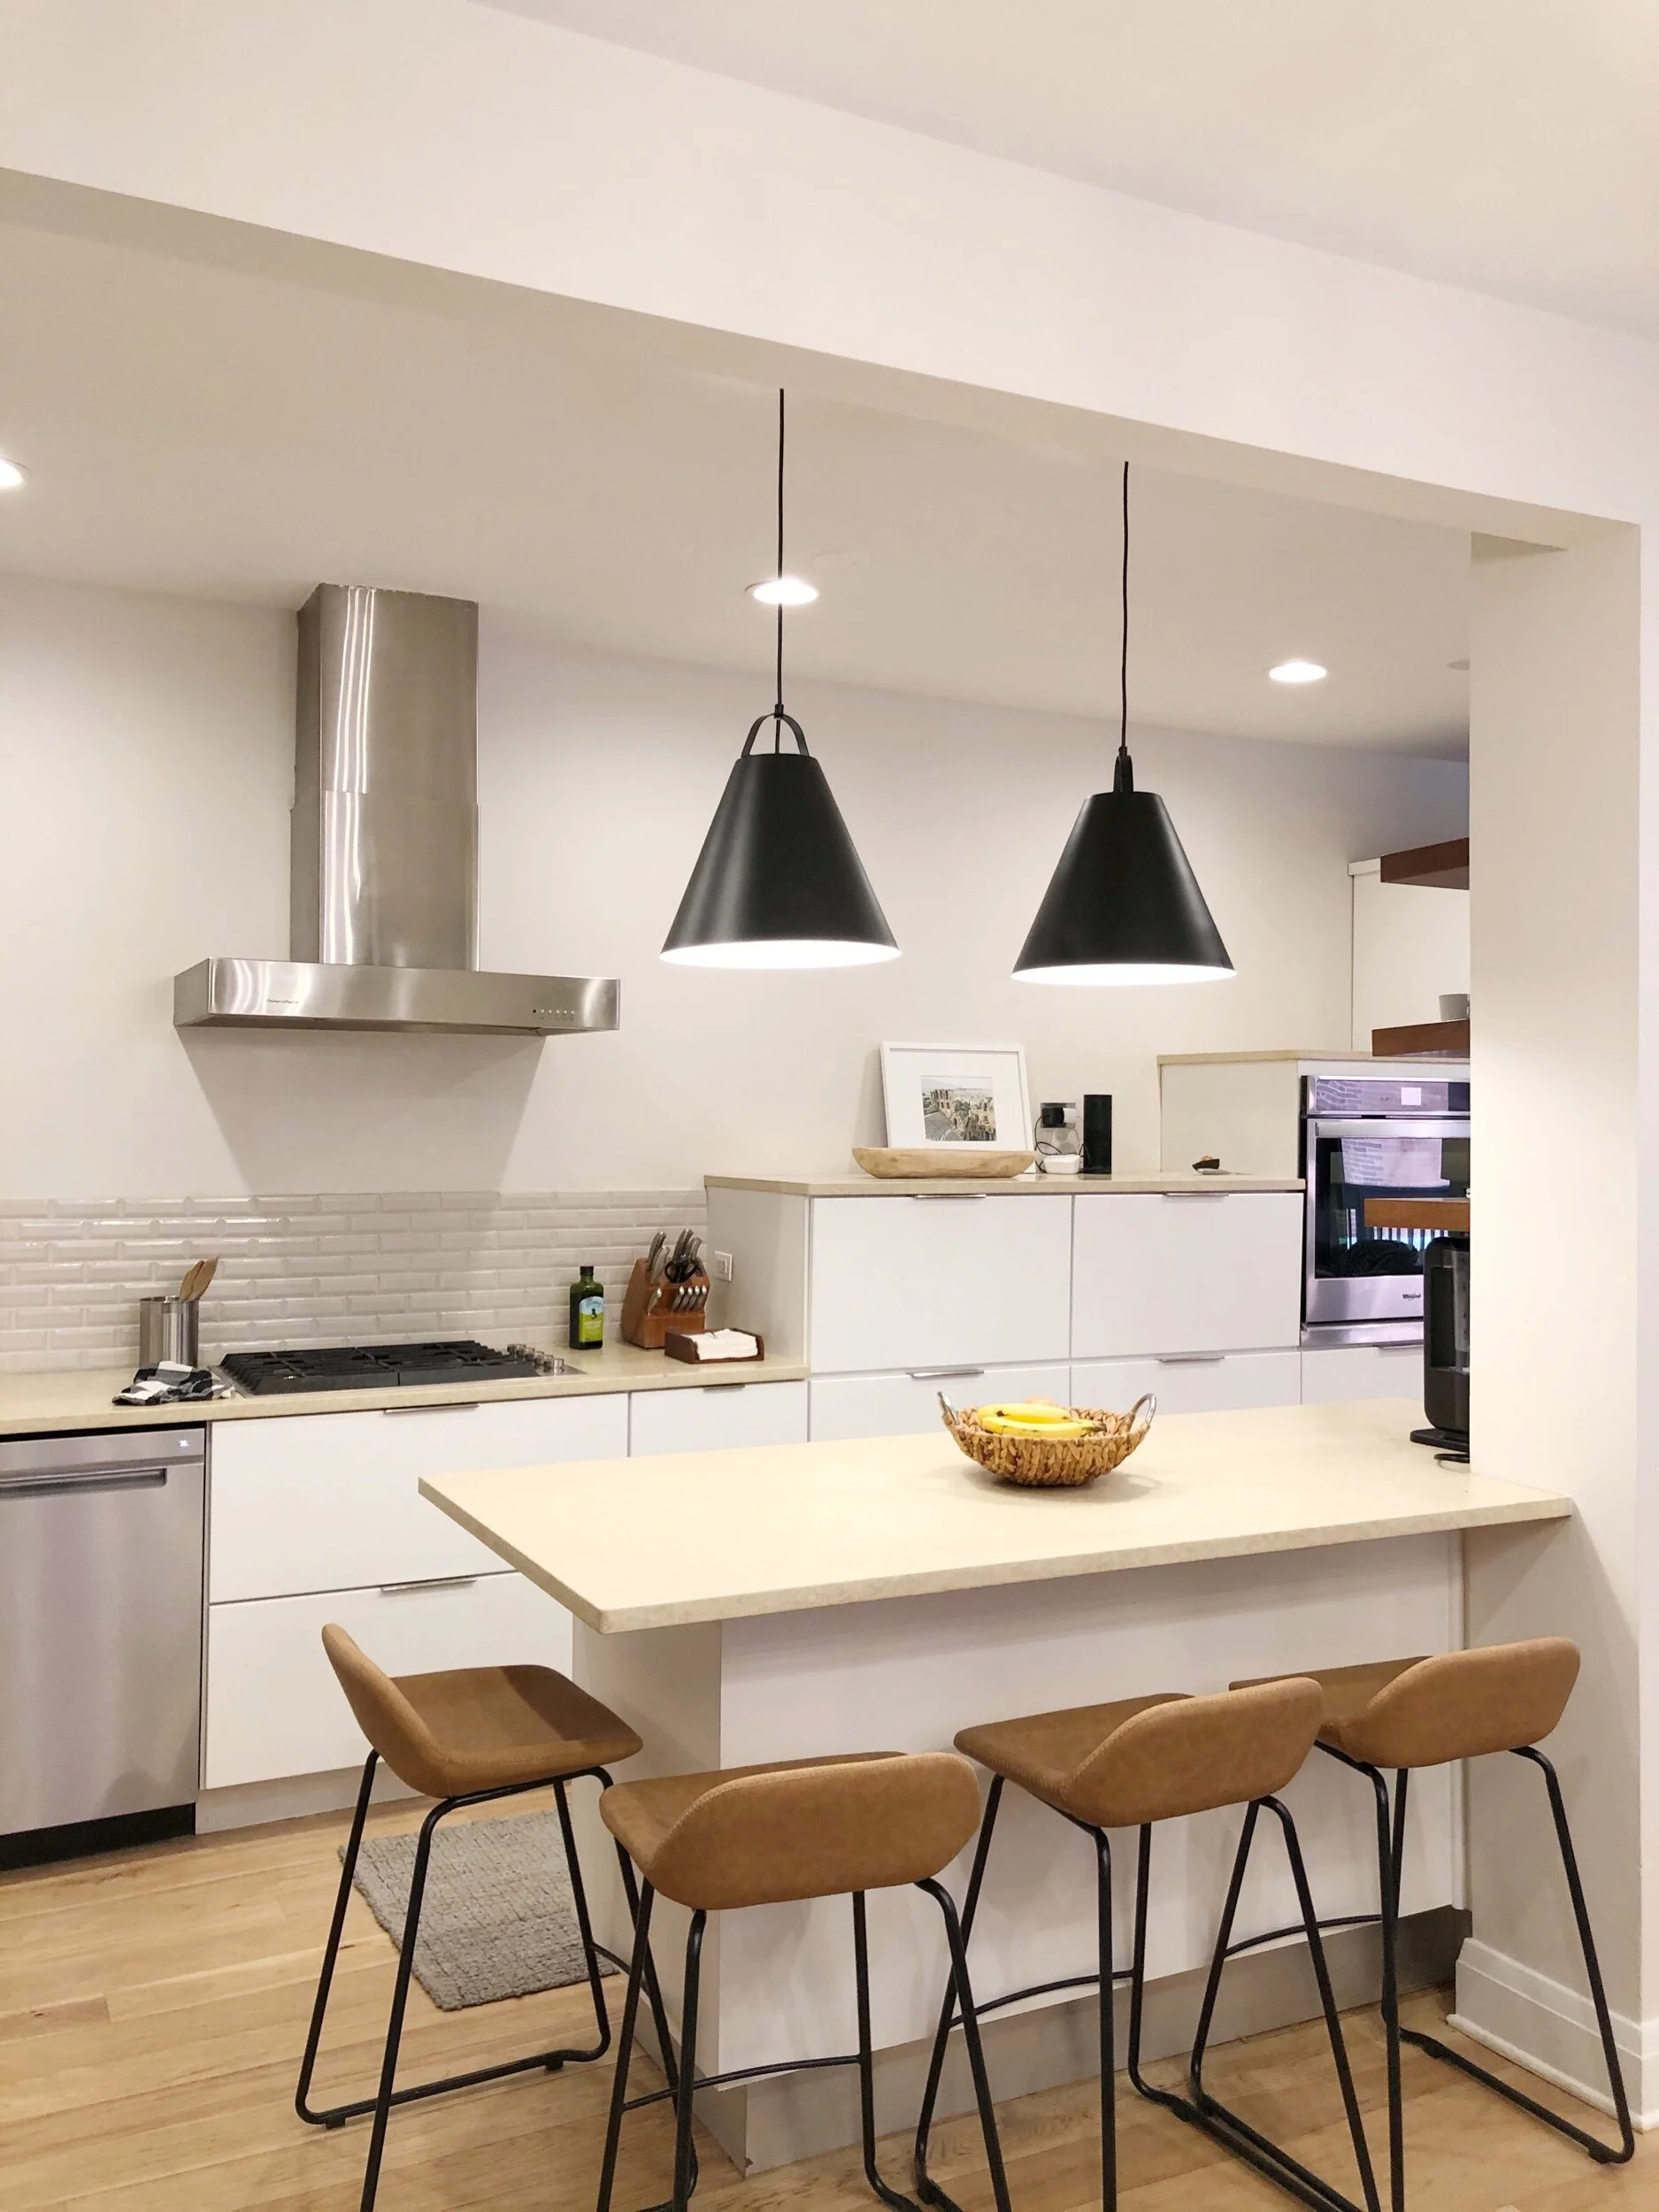
Updated Light Fixtures: Kitchen & Dining
About three years ago we updated the lighting in our old condo and we realized what a HUGE difference it made! We vowed to update the lighting in our new home within a matter of months. And now, here we are! We moved in July and now at the end of November I can say we finished our first lighting project: the kitchen & dining room. Yay! So let’s get into details.
Updated lighting: kitchen and dining
THE ROOM
In our new place, the kitchen is an open concept (which was a huge selling factor for me / life with a toddler). The kitchen opens up to the dining room, a living room and a breakfast nook that we use as a sort of entryway. Since it is all one big open space, we knew we had to treat it all as one room when we updated the lighting. The front of the house (formal living room and den) can wait until next year to get it’s facelift.
BEFORE PHOTOS
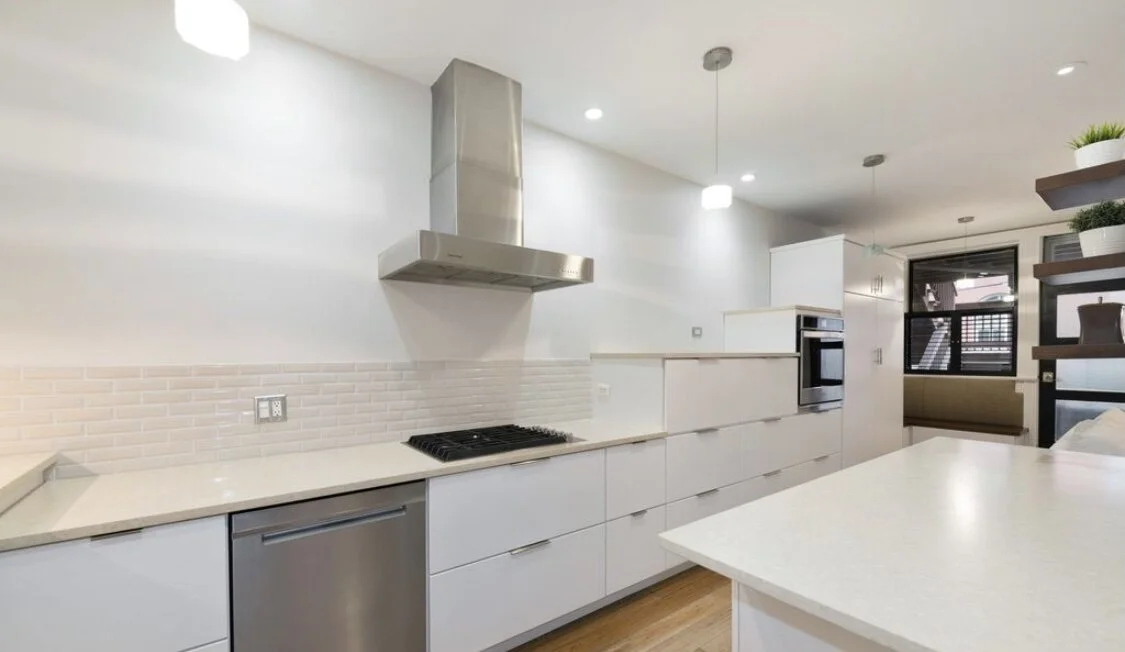
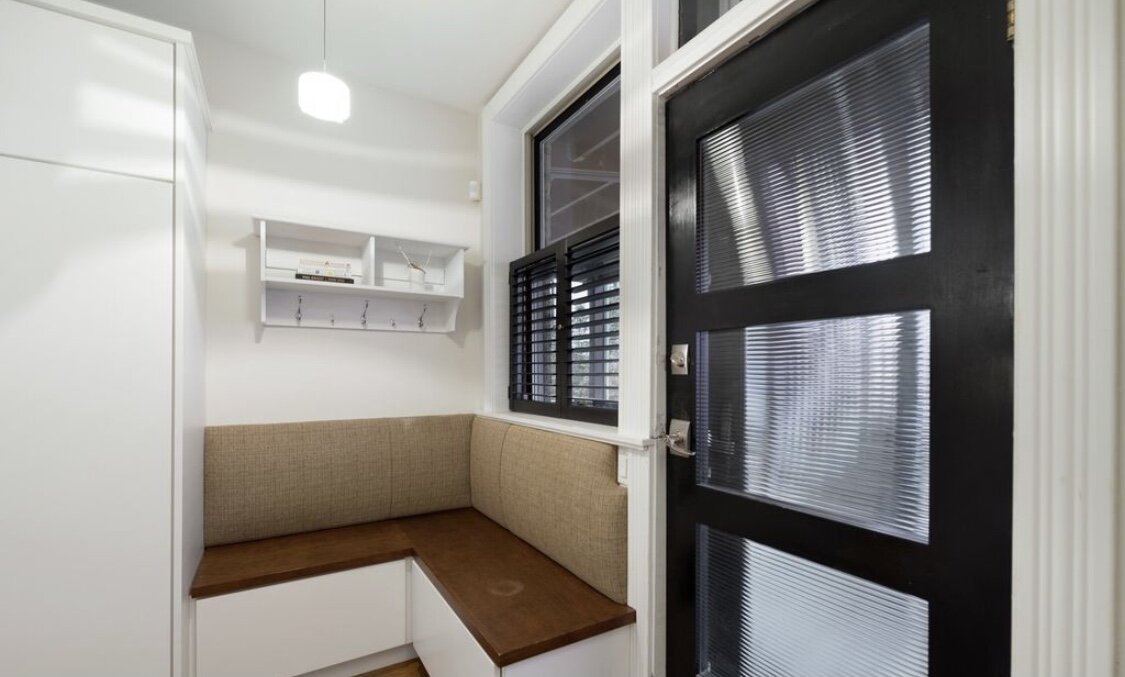
Full disclosure, these are the listing photos, taken before we even moved in (so not our furniture or decor). But you can still get the idea. We had a laundry list of wants and needs when we were house hunting, but an open concept kitchen was at the top of the list. We looked past some of the dated fixtures (knowing we could change that) and tried to see the potential. I will also say, for those interested, we had our floors sanded and stained much lighter than you see in the Before photos. You’ll catch that in the After pictures.
Aside from those details, the kitchen is pretty clean and white, which is great, but also boring. We have slowly started adding character to the space (island pendants have helped with that!). The thing that most sticks out to me is that the pendants are hung over the walkway, which is so odd to me and not that functional, but I’ll get to my To Do list next…
Original kitchen lighting
Old kitchen / dining lighting
Old breakfast nook lighting.
Old living room lighting.
THE TO DO LIST
When I look at the old photos, I am reminded of why we started the lighting project initially.
Island Pendants: The first thing that stuck out to me at our initial showing of the house - before we even bought it - were the very dated kitchen pendants. I couldn’t stand them. But even more annoying to me was that they weren’t hung over the island. Instead, the pendants were placed over the walkway between the island and the stovetop. I found this to be very odd, not to mention my husband only cleared the pendants by a few inches. To Do: RELOCATE the pendants to over the island and UPDATE the light fixtures to something more modern traditional.
Dining Room Chandelier: Something I noticed within the first few weeks of eating at the dining room table was that the light fixture was fairly bulky. And although black is one of my favorite colors, the black lamp shade drew your eye directly to it and brought the sight line lower. We have nice tall ceilings, but the combination of the dining fixture itself and it being hung a little too low made our ceilings seem so much lower. To Do: UPDATE the dining chandelier to something more open / airy and RAISE the height.
Recessed Lights: The biggest piece of the puzzle for me was adding recessed lighting to all of the rooms. The more we lived in the space, I realized we get a lot of sun during a few small windows of time each day. The other hours, the rooms can feel pretty dark. Add in daylight savings and I knew we needed to add the recessed lights before winter hit! Not to mention, recessed lights immediately bring a space into the current decade. Trust me. To Do: ADD recessed lights to the kitchen, dining, and living rooms.
Breakfast Nook Pendant: Last but not least, the breakfast nook that also serves as a mini entryway for us. This space was already wired for a pendant and I had hastily added a black basket-weave lamp shade to it a month or so ago. It just wasn’t working. I knew we needed something a little brighter and simple. Don’t worry, we moved the basket light to over the bathtub and it works wonderfully! To Do: UPDATE the pendant over the nook.
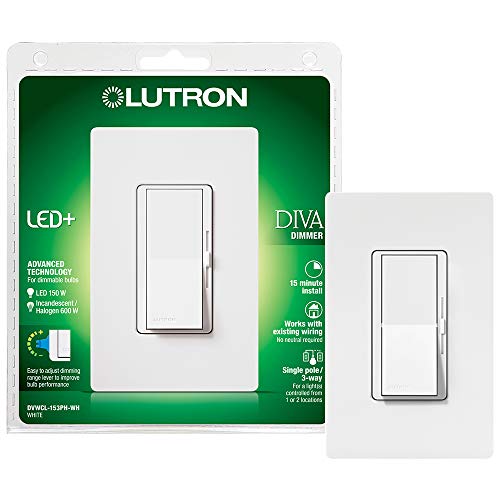
Other To Dos: Of course, as with any project, we encountered some scope creep. Once we decided to change every light fixture in the whole room, we realized some of the light switches would need replaced to be LED compatible. Some switches also needed dimming ability. We also had our handyman change the positioning of some switches to make more sense with the flow of the room. Finally, while our handyman was spending so much time on the ceiling, he even replaced our smoke detector :)
LIGHTING PLACEMENT
As I mentioned, we worked with a licensed electrician (our handyman) to add all of the recessed lights, as well as re-position the kitchen pendants to be over the island. My husband and my dad helped me with simple swaps of the other fixtures to save on cost.
After receiving a quote from our handyman, he estimated the work would take about 3-4 days. When all was said and done, the entire project ended up taking about 6 days total.
The placement of the recessed lights became a crucial step in the process. Here is what we learned:
Map out your lights before cutting: I HIGHLY suggest mapping out the light placement on the ceiling with tape or pencil before you start cutting. We had our handyman mark everything with blue tape before he made cuts and we even slept on it for a night before we made final decisions.
The distance between each row of recessed lights: ours were positioned at 50” between each and 30” off the wall. It all depends on the size of your room, of course.
Centering: you can choose to center your lights around the room itself. Or, in the case of our dining room, around an existing fixture (our chandelier).
How many lights on each switch: we chose to put 4 dining room lights on one light switch and the other 6 living room lights on another light switch. That way we can control the rooms separately. For the kitchen and breakfast nook, there are 7 recessed lights that operate on one light switch. The nook pendant and island pendants operate independently.
Ceiling beams and other roadblocks: this is where a licensed electrician is key. Once we mapped all of our light placements (in blue tape on the ceiling before ANY cuts were made), our handyman cut into the ceiling and noted some beams were directly in the way of our lighting. We had to tweak a few lights by an inch or two to make it all work. A few similar issues came up in the kitchen, so we adjusted the lighting as needed. Having it all mapped out ahead of time made it easier to judge which direction and by how many inches we could move a light without it making a huge difference to the overall plan.
Placement of recessed lights in the dining room.
PLACEMENT OF ISLAND PENDANTS & DINING CHANDELIER
I found this very helpful article by Studio McGee on how to size and hang lighting in your home. I used the recommended measurements to figure out how high to hang the pendants and chandelier. For example, for the island pendants they recommend hanging 30”-32” from the top of the counter to the bottom of the pendant. We settled on the lower of the two and hung at 30”. For lights above a dining table, they recommend 33”-34” from tabletop to bottom of chandelier. We went with about 34”. Again, this is just a guide to get you started. Each room has different features and challenges to work around (maybe you have exposed beams or a feature wall or a dropped ceiling you need to work around. Every scenario is unique, but once you have some standard rules to go by, you can adjust according to your own space.
How To Hang Lighting - Studio McGee
WHAT WE NEEDED
What we needed to update kitchen lighting.
Once we figured out ALL of the placements, measured, and counted how many lights we would need…it was time to buy some things! The way our handyman works is he charges us per recessed light and then by the hour after that (i.e. for the island pendants, etc.).
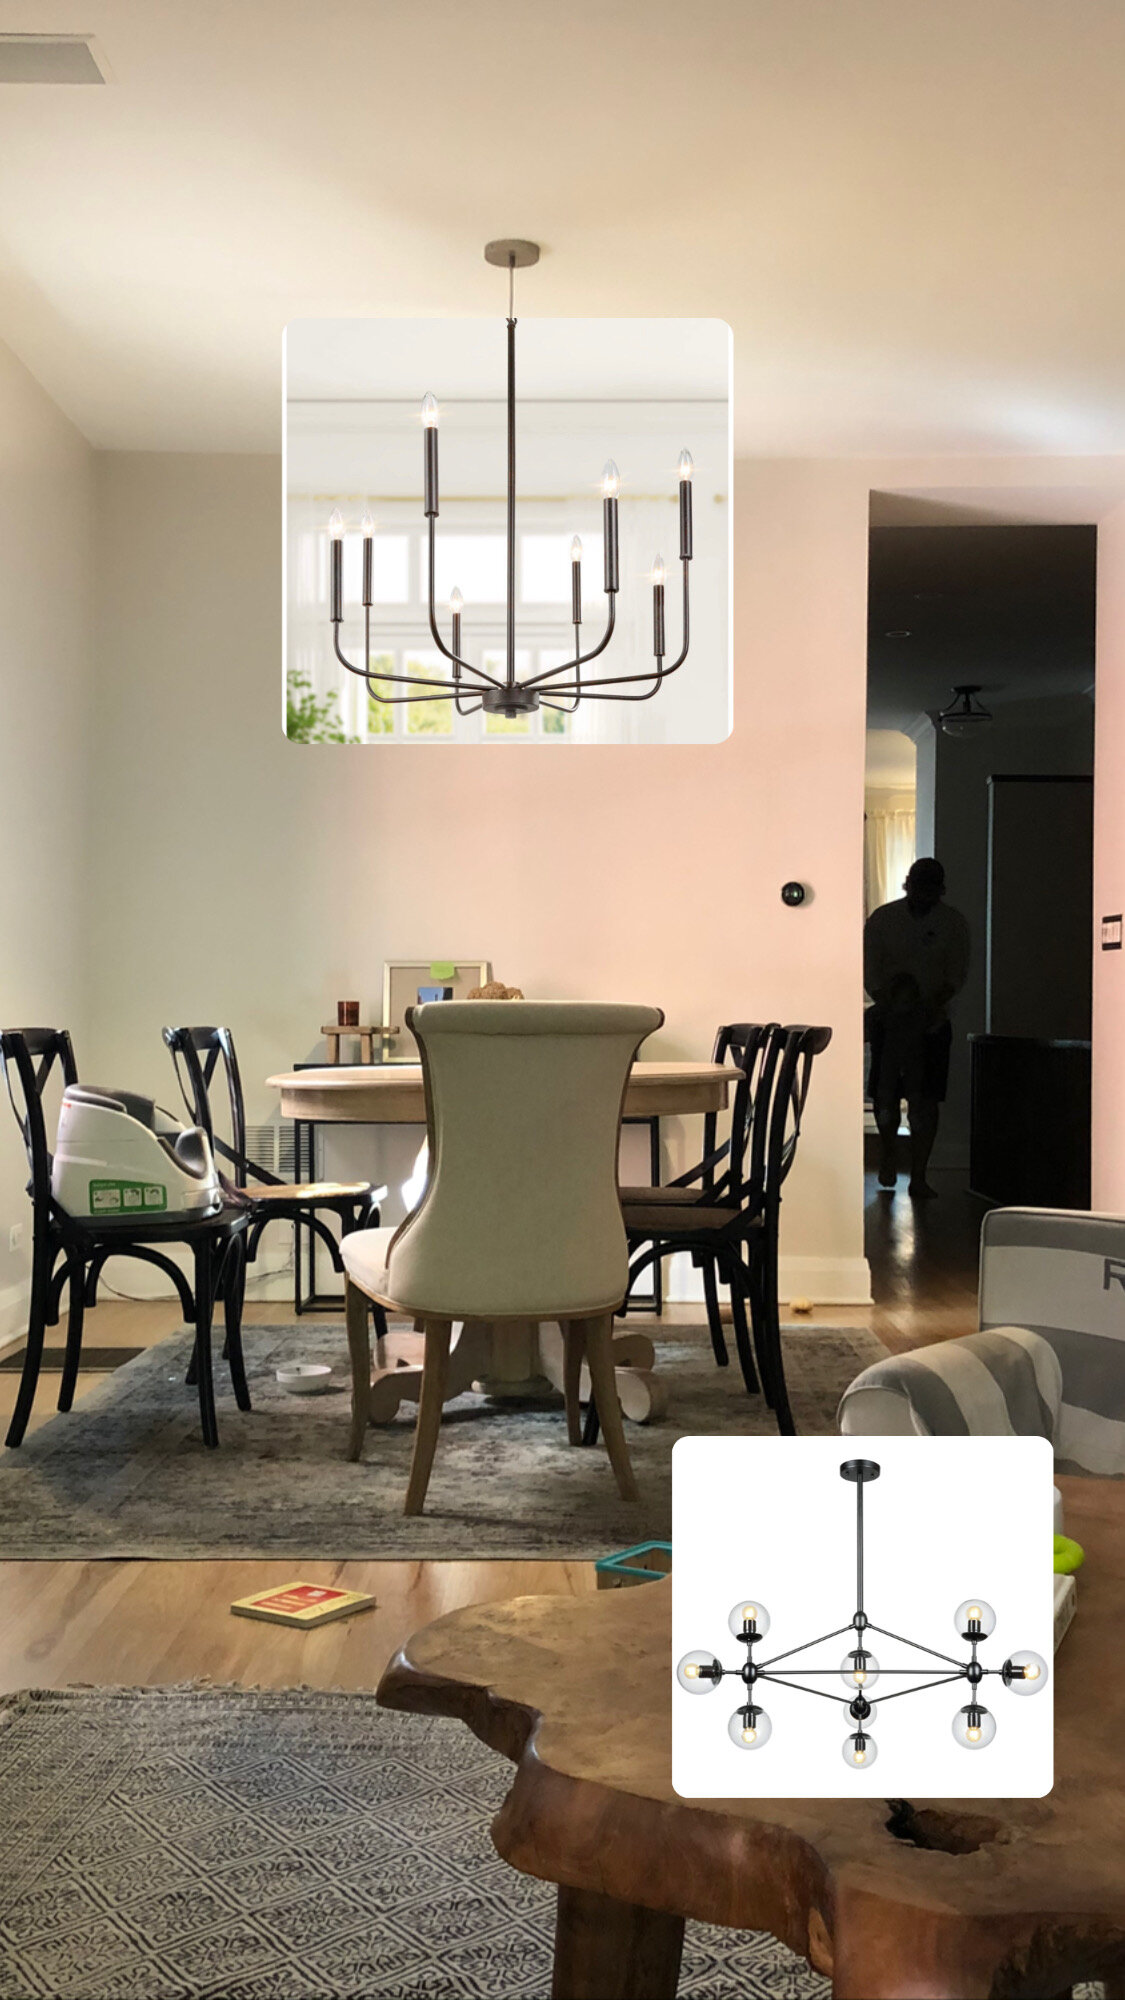
For the pendants and chandelier, I figured out the look I wanted by mocking it up online. Here are the photos of my mock-ups.
Choosing a dining chandelier.
Choosing pendants for our kitchen.
For the recessed lights, we knew from our last place that we wanted LED, dimmable, and around 2700Kelvin (which is the temperature of the light). These Commercial Electric recessed lights are really cool because you can ADJUST the temperature of the lights even after you install. So if you want something warmer or cooler, you just flip a switch on the light. Very neat in my opinion.
Here is what we needed and scroll down for the AFTER photos!!
Recessed lights - Amazon link below
Recessed casings - Home Depot or Lowe’s
LED Dimmer switches - Amazon link below
Dining Chandelier - Amazon link below
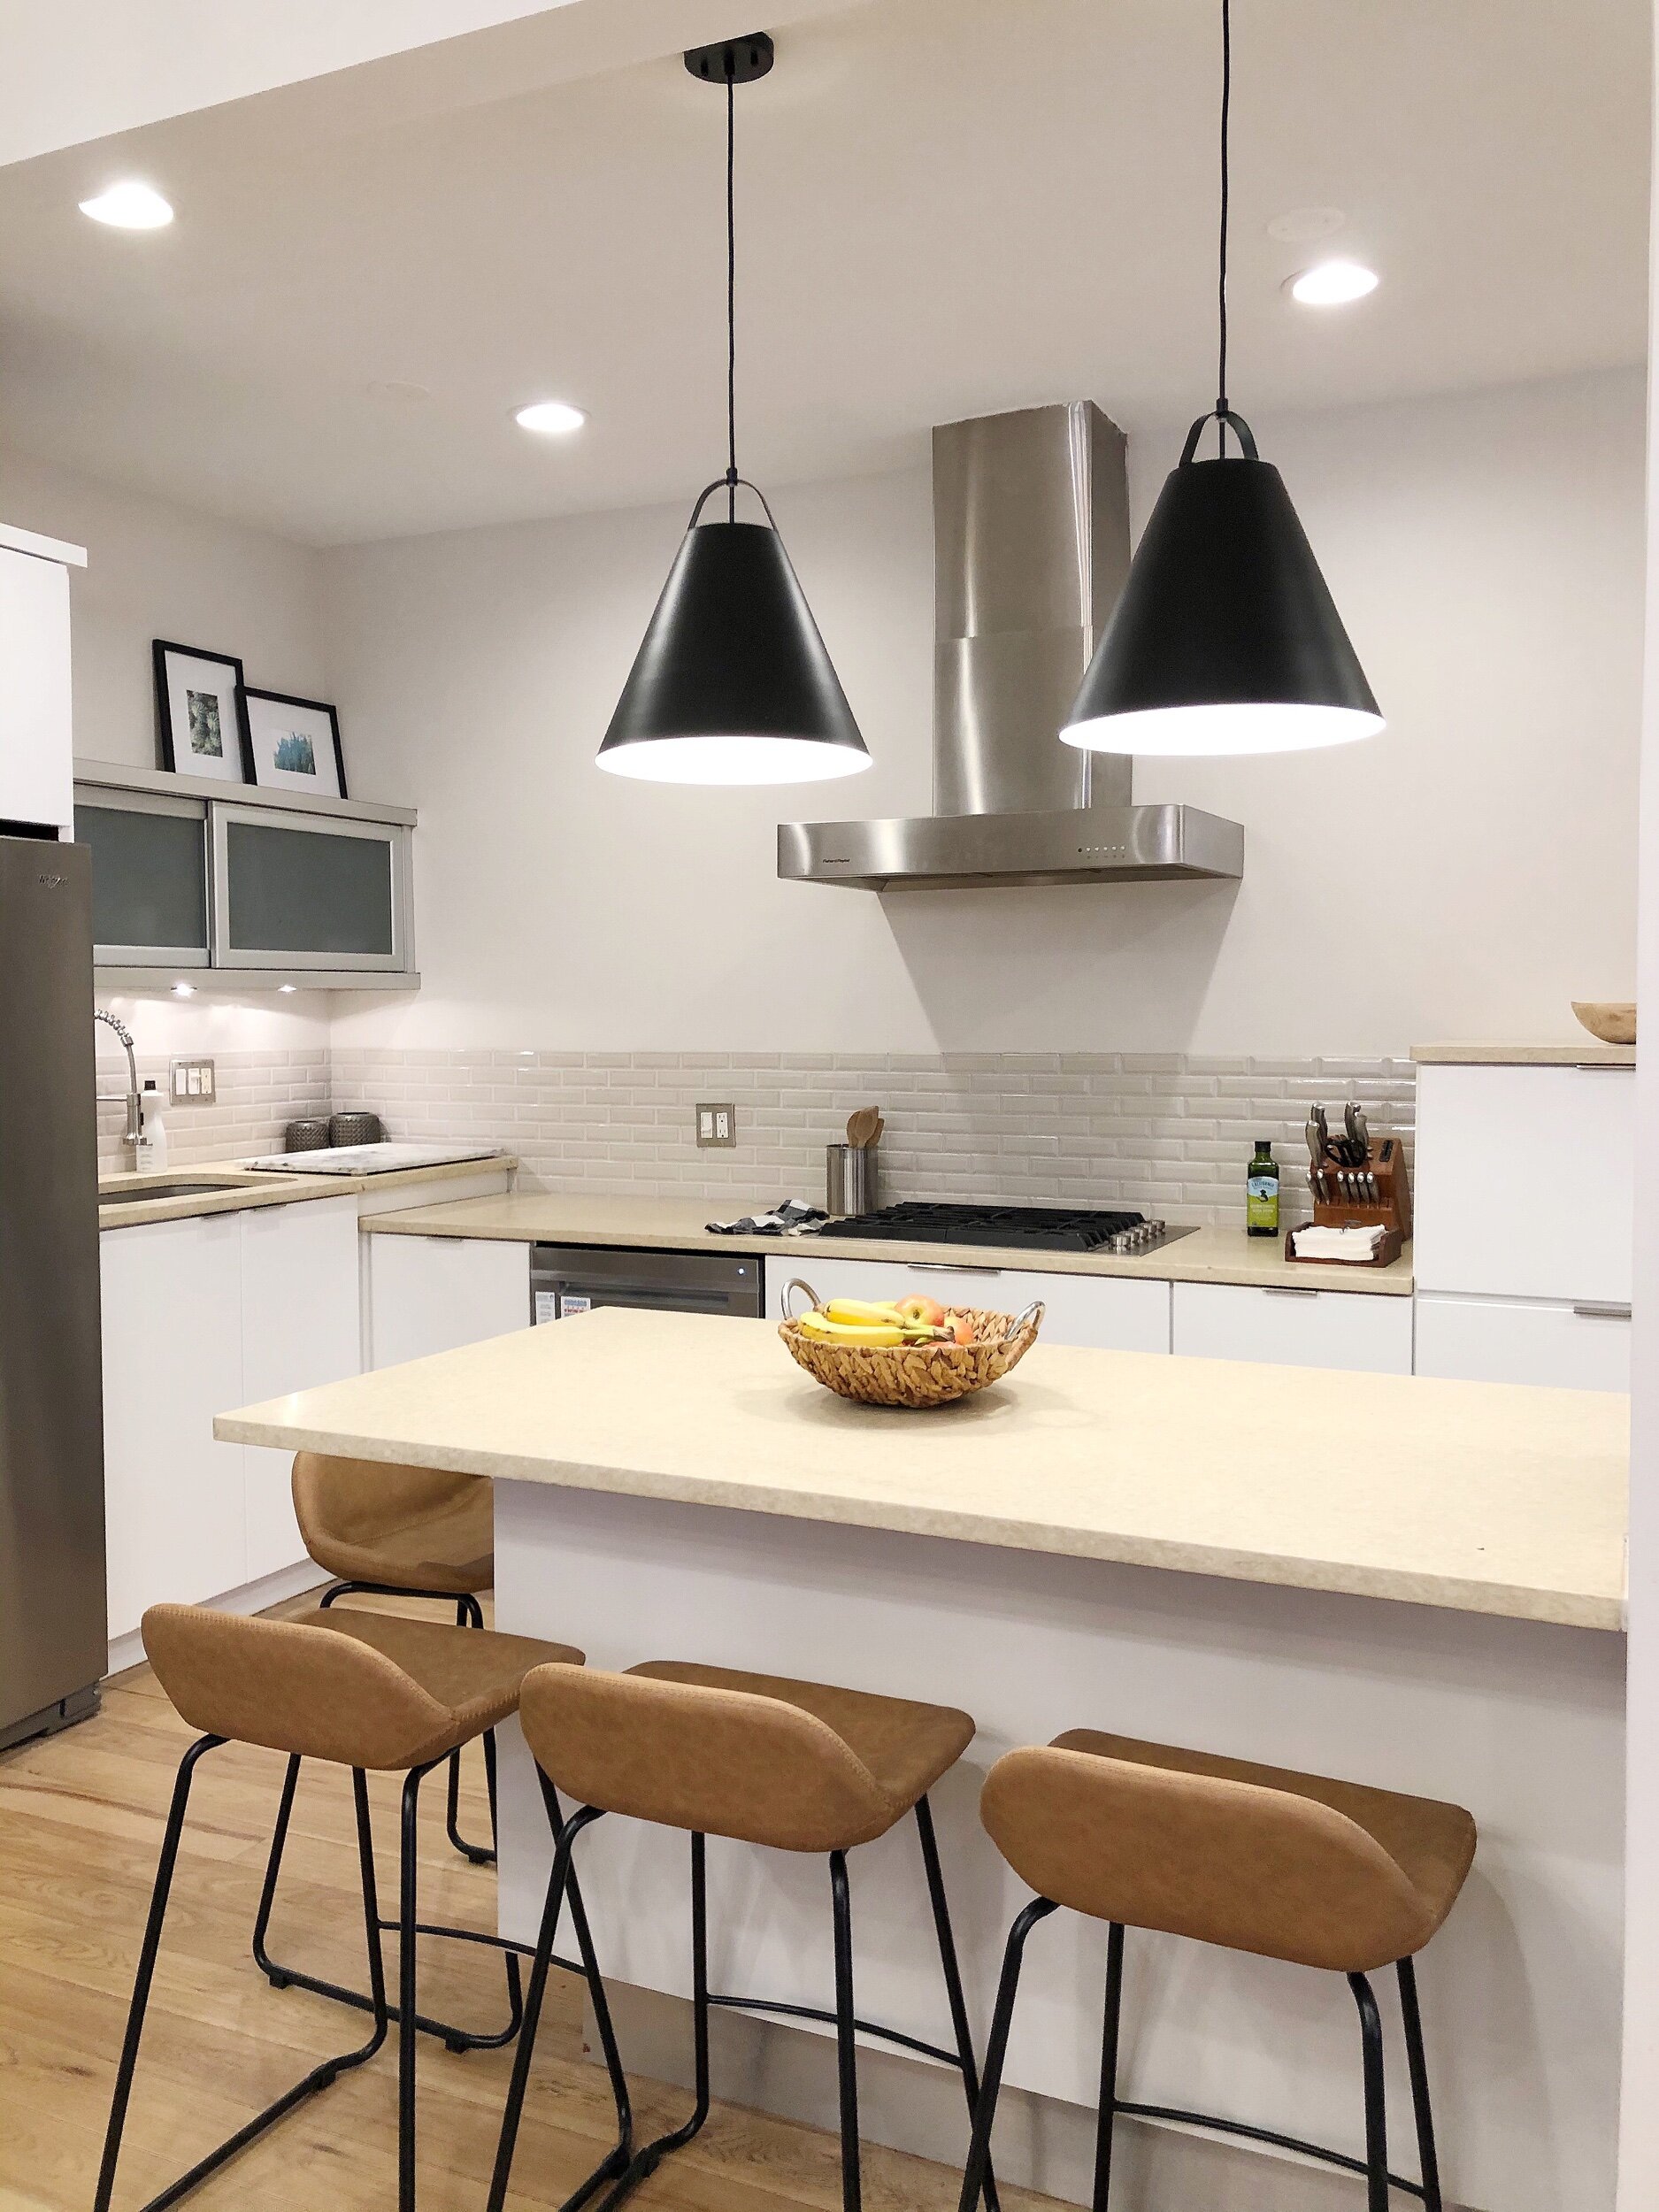
Conical Pendants Black (for island) - Overstock
Globe Pendant (for breakfast nook) - Amazon link below
AFTER PHOTOS
And now, the final product! After 6 days and a lot of measurements, we have our new and improved lighting for our open concept kitchen, dining, living room. Check it out and let me know what you think!!
Updated kitchen lighting: black conical pendants.
Updated kitchen island lighting and barstools.
Updated kitchen lighting, recessed lights and island pendants.
Updated kitchen island lighting.
Updated dining room lighting chandelier.
Updated dining room lighting.
Updated breakfast nook / entry way lighting.
Updated living room lighting.
Updated living room lighting.
Thanks for coming along on this project with me! If you want more information about the whole lighting process, visit my Instagram stories @blueprintbykelly.

